Change a Team Member’s Role or Room Access
Change one person’s role or the rooms they work in.
Last updated About 2 hours ago
Change one person’s role or the rooms they work in.
For center admins using Bloomily on a computer. The orange outline shows where to look or click.
1. Open Settings
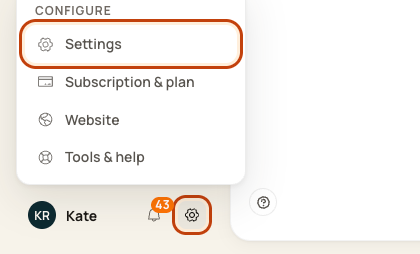
Click the gear at the bottom left. Then click Settings.
2. Open Access
Click the Access tab. Find Staff roles.

3. Open the current role
Find the role the person has now. Click Edit access beside that role.

4. Move the person
In Action, choose Move staff to another role. Pick the staff member and the new role under Move to. Click Change staff role.
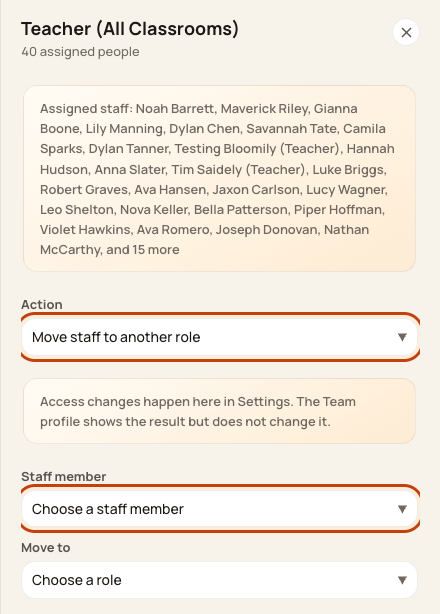
At the bottom of the form:

5. Set their rooms
Go back to Team, then People. Open the person and click Assign rooms. Tick the right rooms and click Save rooms.
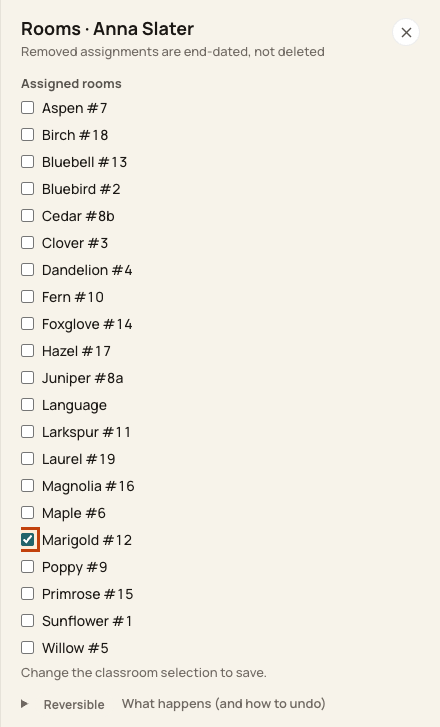
At the bottom of the form:

Tick every room they work in. A room you untick is taken away. With 2 or more rooms, pick their Main room, so the schedule and the live board count them in the right room. For roles that see every room, ticking rooms doesn’t limit what they can open.
Some centers see a Works in card on the person’s record instead of Assign rooms. Choose Edit access there to set their rooms.
Good to know
Use Move staff to another role for one person. Changing the role’s permission levels can affect everyone with that role. An all-rooms role can still see all rooms.
Check when you are done
Check the person’s record and have them check their access. If your center shows App access instead of roles, use Edit access on their Team record.
Walkthrough: Give a teacher several classes at once
The recording uses one center’s example data. Names, amounts, dates, counts and configured policies are examples; use your own center’s records and settings. Some labels in the recording may differ from the written steps above.
Walkthrough: Manage Team Member App Access in Bloomily
Open Team and select the staff member.
Open the record menu > Account access.
Review Organization access, select the intended access, and choose Change access.
Review the confirmation, submit and check the saved access.
Choose access appropriate to the person’s duties. App access and room assignment are separate; changing one does not establish the other.
The recording uses one center’s example data and settings. Names, amounts, dates, counts and policy choices are examples. Follow the written guidance above where recording labels differ.
Open the walkthrough in a new window
Walkthrough: Generate and Manage Device PIN for Team Members
Open Team and select the staff member.
Open More actions > Device PIN.
Review Generate PIN and its confirmation, then submit when a reset is intended.
Give the new shared-device PIN directly to the intended staff member and close the result.
This is the staff member’s shared-device sign-in PIN, not their web password or a guardian kiosk PIN. Generating a new PIN is an access change; do not reuse the example PIN in the recording.
The recording uses one center’s example data and settings. Names, amounts, dates, counts and policy choices are examples. Follow the written guidance above where recording labels differ.
Was this helpful?