Schedule Overview
Use the week view to plan who works each day.
Last updated About 2 hours ago
Use the week view to plan who works each day.
For center admins using Bloomily on a computer. The orange outline shows where to look or click.
Before you can schedule someone
Add the person to your team first. The grid shows people scheduled or placed on the selected week. Search can find other active team members; use Put someone on the week to add someone who is not on that week yet.
Scheduling them is what makes them appear elsewhere. Staff show on the Day Board only for days they have been given shifts on — a person added to your team but never scheduled won't appear on any day's room plan.
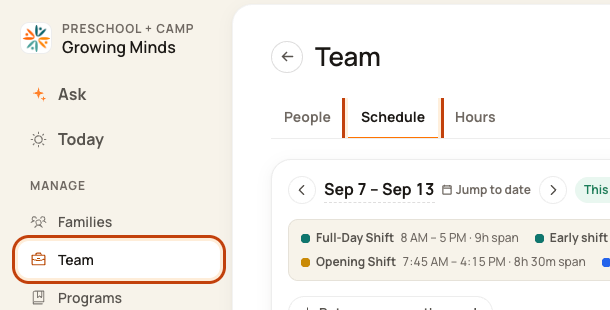
1. Open Schedule
Click Team on the left. Then click Schedule.
2. Choose a week
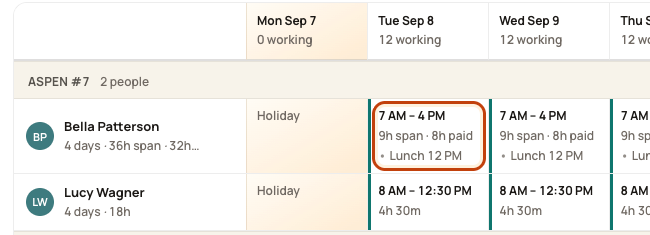
Use the arrows or Jump to date. Check the date range at the top.

3. Read a day
Each row is a person. Each box is a date. The box shows their planned hours, break, or day off. Click a box to change it.
4. Check rooms by time
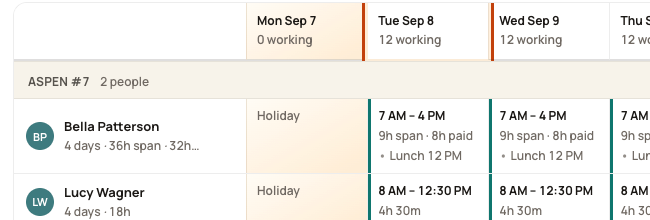
Click a date heading to open the Day Board. Use it to check room staffing through the day.
Good to know
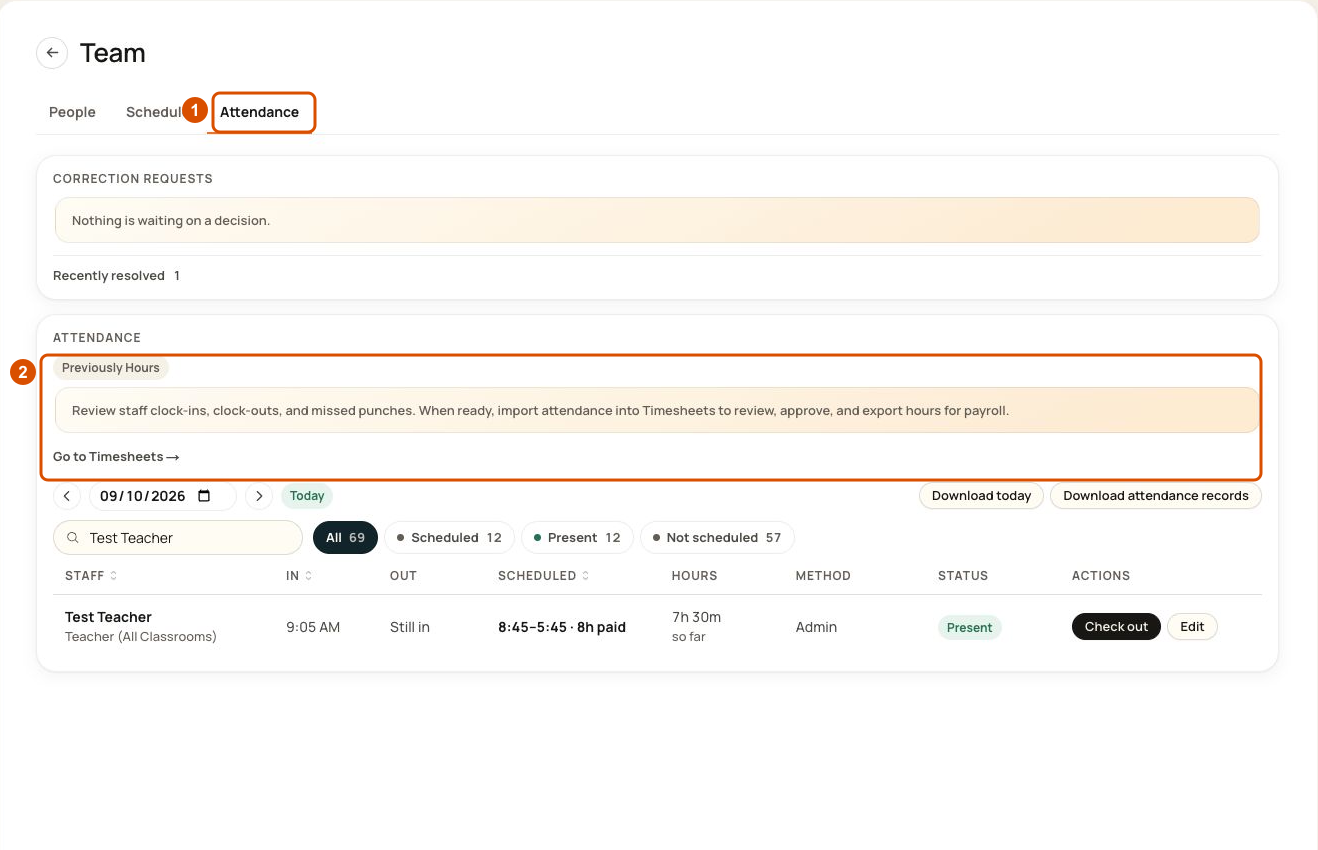
The weekly plan does not show who has clocked in. Use Team → Attendance for that.
Walkthrough: Schedule Overview
Open Team > Schedule.
Use the week controls, Day view and staff or room search to set the scope.
Review coverage warnings, then choose Room or Name to organize the schedule.
Use the week menu for the available scheduling tools and Attendance to review worked time separately.
Scheduled shifts and worked hours are different records. A schedule or coverage warning does not itself establish actual attendance or payroll amounts.
The recording uses one center’s example data and settings. Names, amounts, dates, counts and policy choices are examples. Follow the written guidance above where recording labels differ.
Open the walkthrough in a new window
Walkthrough: Build and Manage Team Schedules on Bloomily
Open Team > Schedule and choose the intended week.
Use Put someone on the week to select a staff member.
Use their actions to set a whole week or edit individual day cells, selecting the intended shift and hours.
When adding a break or other time block, check whether the change applies to one day or every day.
Review the saved schedule and the separate publishing option when ready to share it.
Done closes the result. Saving schedule changes and publishing them are distinct steps; review the action’s actual result and audience.
The recording uses one center’s example data and settings. Names, amounts, dates, counts and policy choices are examples. Follow the written guidance above where recording labels differ.
Open the walkthrough in a new window
Find actual clock records
Open Team → Attendance (previously Hours). Search for a person and use the status filters. A scheduled shift is a plan, not proof that the person worked it. Download attendance records exports raw clock records, which may be incomplete or unreviewed. Use Go to Timesheets to import, review and approve hours for payroll.
Was this helpful?