Add Lunch, Break, Prep or Support Time
Add a lunch, prep, meeting, or support block inside a working day.
Last updated About 2 hours ago
Add a lunch, prep, meeting, or support block inside a working day.
For center admins using Bloomily on a computer. The orange outline shows where to look or click.
1. Open Schedule
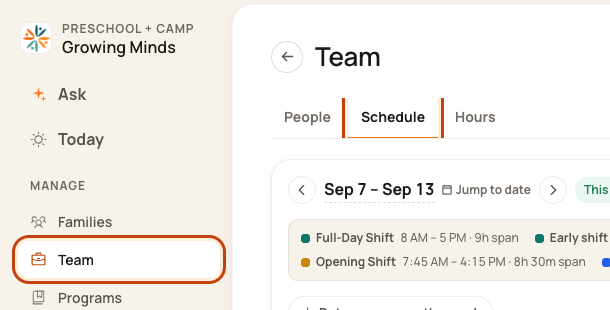
Click Team on the left. Then click Schedule.
2. Open the day
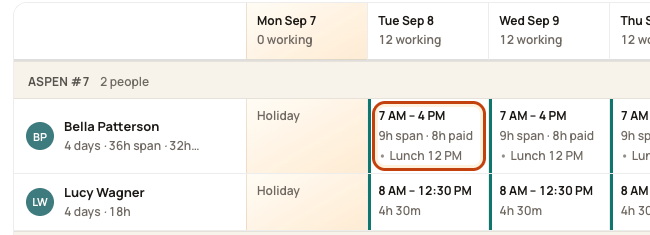
Find the person’s row. Click the box under the date you want. Check the name and date before you go on.
3. Set lunch in its own section
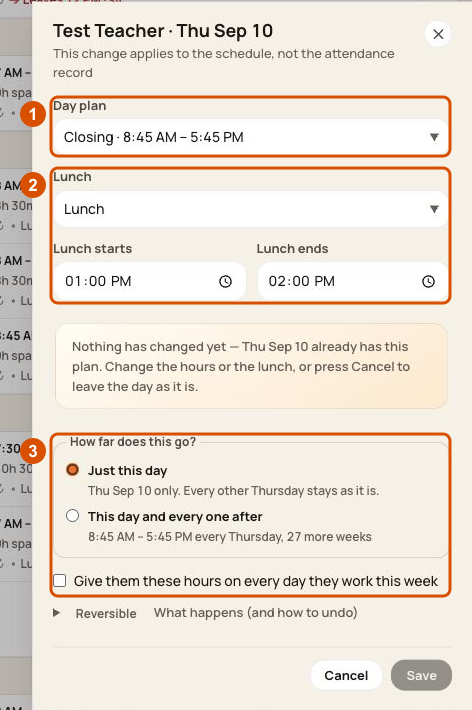
Keep the working shift selected in Day plan. In the separate Lunch section, set Lunch starts and Lunch ends, or choose No lunch. Lunch must fit within the working hours. If you shorten a shift, recheck lunch before saving.
4. Check the scope and save
Choose Just this day when the scope options appear. Keep the whole-week checkbox clear unless you intend to change every workday shown by that option. Check the person and date, then choose Save. An unchanged form has Save disabled. Cancel discards the edit.
Add preparation or support time
For preparation or support, use Day plan → Add prep or support time. Review the type, times and scope in that form before saving. Do not use that option to find the separate Lunch controls.
Check when you are done
Recheck the hours and lunch in the weekly grid, then open Day to review the affected room intervals. Scheduled time, actual attendance and payroll hours are different records. Review the separate publish preview when the plan is ready.
Was this helpful?