How Families View Menus and Place Meal Orders
Use Meals in your family portal to review the available menu and order for the correct child. Available meals, prices and ordering deadlines come from your center.
Last updated About 2 hours ago
Use Meals in your family portal to review the available menu and order for the correct child. Available meals, prices and ordering deadlines come from your center.
Workflow: Choose child → Choose meal & date → Review dish & price → Place order → Check confirmation
1. Open Meals for your child
Sign in to the family portal, open Meals and select the correct child if you have more than one. Choose the meal type you want to review.
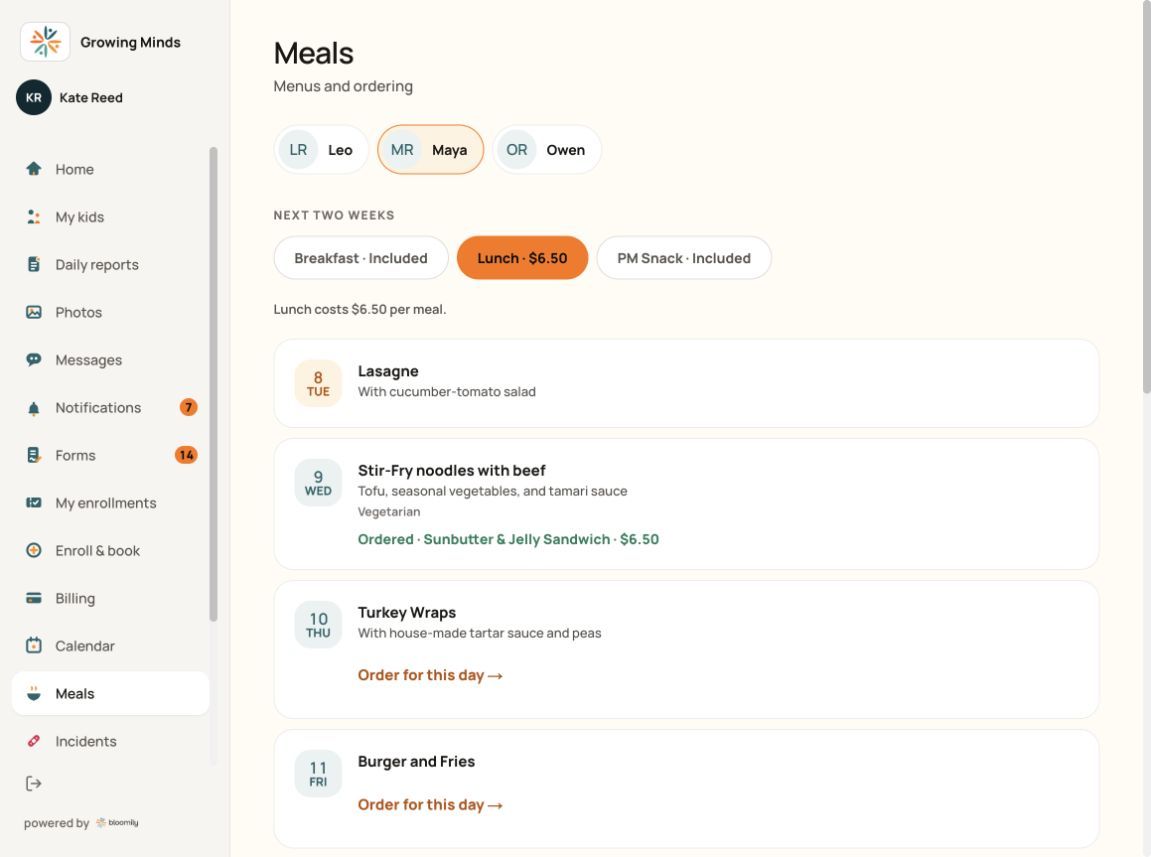
Select the child first, then the meal type. Prices shown are this example center’s prices.
2. Review the date and menu
Look under Next two weeks and find the service date. Read the menu and information shown. If the page says Menu not posted yet — order the standard menu and offers an Order button, you can review a standard-menu order. If no ordering action is available, check with your center about its service days and deadline.
Some centers close ordering the same morning as the meal, not just the evening before — check the deadline shown for that meal type. Once it passes, the day reads Ordering for this day has closed., with no Order or Cancel action there anymore.
3. Choose and review the meal
Select Order for this day where available. Choose a dish when required, or No preference if your center offers that option. Review any price and late-order message before confirming.
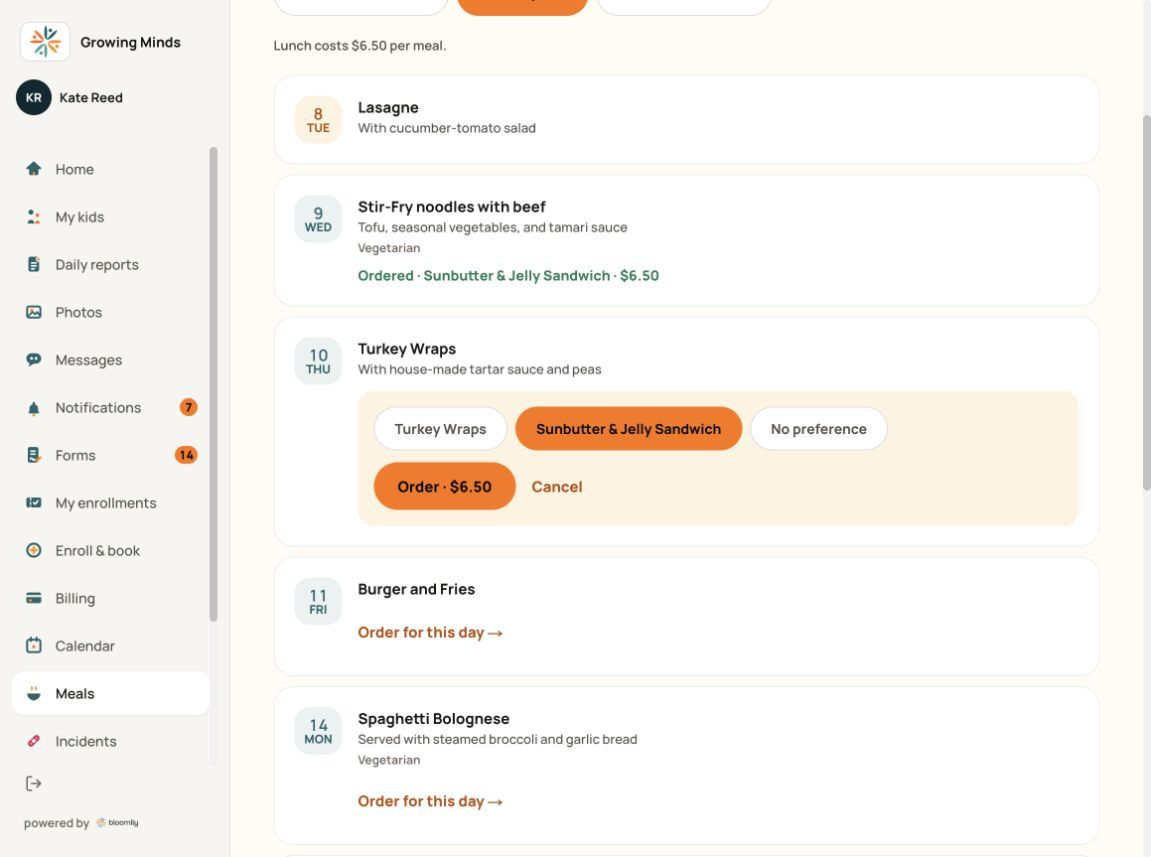
The orange dish is selected. Review the Order button’s amount before placing the order.
A dish your center always offers — such as a standing side — can appear in the picker every day, alongside that day’s own menu items. If your center turns a standing dish off, it disappears from days nobody has ordered it on, but stays as a choice on any day where a family already has.
4. Confirm and check the result
Choose the Order button. Wait for the confirmation and check that the day shows Ordered with the expected selection. Do not assume opening the picker placed the order. The green Ordered line in the screenshots is an existing order; the open picker for another date is not yet an order.
5. Cancel or ask for help
If a Cancel action is available on an existing order, review its confirmation before cancelling. If ordering is closed, a choice is missing or billing needs correction, contact your center.
6. Order many days at once
Choose Order the month to order one child’s meal for a whole month in one visit. Every offered day starts ticked with its default dish; untick a day to skip it, or use the dropdown to change the dish for any day. Review the estimated total, then confirm to place all the ticked days at once. A day already marked Served or No-show is shown read-only and is not affected.
Before you finish
There is no universal meal price, cutoff or late fee. Use the details shown for your center and child.
Depending on the center’s billing setup, an order may be invoiced immediately or through a later billing process. An order confirmation is not proof of payment.
Cancelling an order does not by itself prove an invoice was credited or money was refunded. Contact your center about billing adjustments.
Once your center marks a meal Served or No-show, the day shows that outcome instead of Ordered, and there is no Cancel button — the record is finalized. If it looks wrong, contact your center; a staff member can correct it. (The Android app does not currently offer meal ordering.)
Some centers ask you to confirm a short statement before your first order — look for Your school asks you to confirm: and tick I agree. This can appear on a single day’s order or on Order the month’s submit button. You are asked again only if your center changes the wording.
Related guides
Screenshots show an example center. Meal prices, times, service days and ordering policies depend on your center’s configuration.
Parent app walkthroughs
These walkthroughs show the Bloomily parent app. Web-portal labels can differ. Available features and actions depend on your school, your access and app version.
How to View Your Child's Meal Menu
Open More > Meal Ordering under Services.
Choose your child, meal type and date.
Review the dish, description, price and dietary information.
If placing an order, select the offered meal option, review the details and select Order Meal. Check the result.
The walkthrough includes ordering as well as viewing. Follow your center’s deadlines and confirm dietary or allergy concerns directly with the center.
Was this helpful?