Staff-assisted check-in and check-out
For teachers: staff-assisted check-in and check-out from the Today screen, what feature to use when to keep a count of all kids.
Last updated About 3 hours ago
Most families check themselves in at the kiosk. Staff-assisted check-in is what you use when that isn't happening.
When to use it
Reach for staff-assisted check-in when:
Your center doesn't use a kiosk
An authorized pickup person is dropping off or collecting
The adult's PIN is forgotten or unavailable
The adult can't get into the parent app
Anything else where a staff-assisted fallback is needed
The Today screen
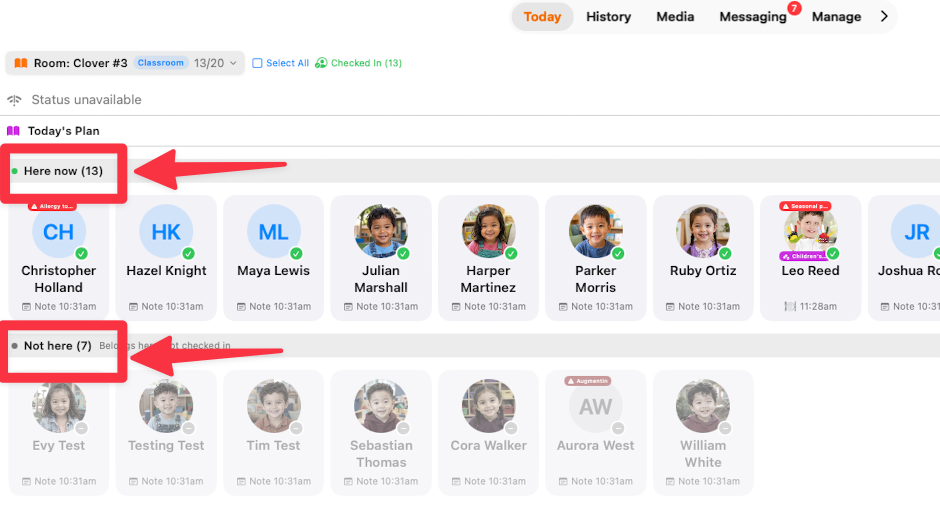
Everything here happens on Today in Bloomily Center. Your room's children sit in two groups:
Here now — checked in and present
Not here — belongs to this room, not checked in
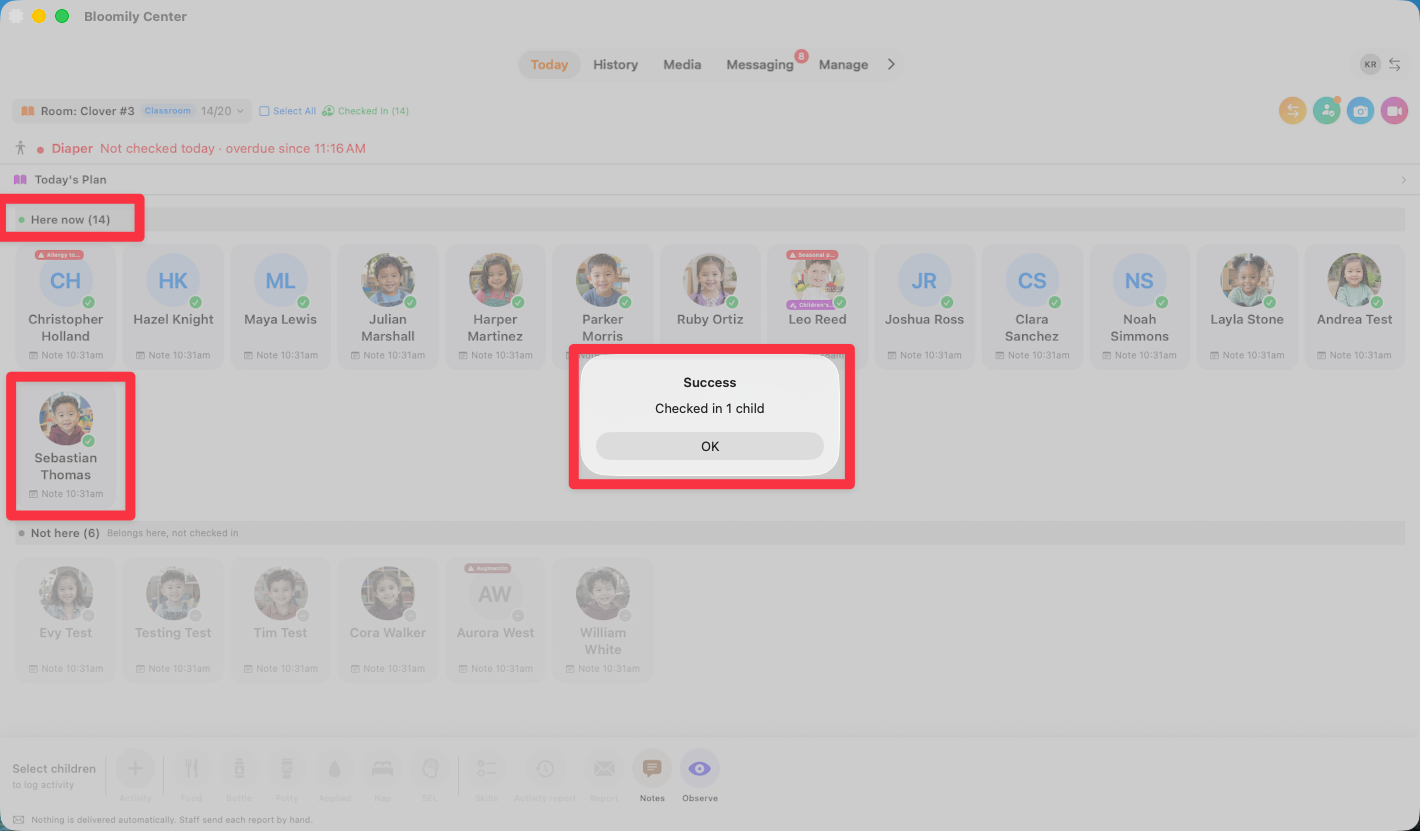
A child moves between the two as you check them in and out, and the room count at the top updates with them.
Select a child's card and the action bar is along the bottom of the screen. The first two buttons are the ones this article is about.
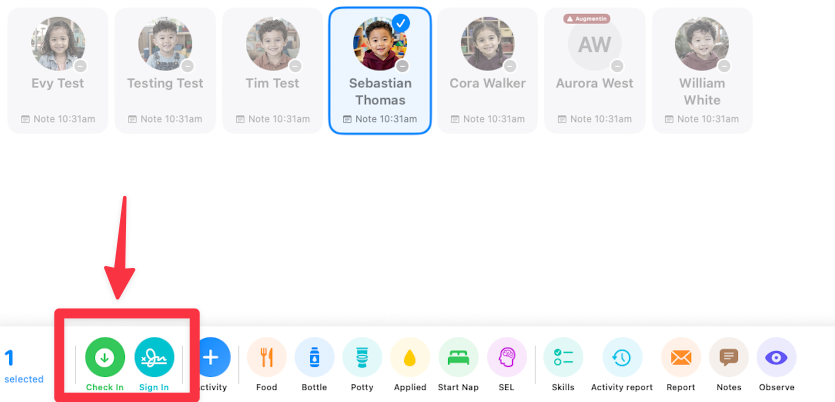
Two buttons, two different records
The action bar offers Check In and, when your organization enables guided sign-in, Sign In. They record different kinds of attendance evidence. If Sign In is missing, ask an administrator to check Settings → Safety → Sign In on the iPad.
Sign In is the one to reach for if your organization or program requires signatures and proof of drop-off and collection. It produces the record your center can stand behind.
When Check In is the right call
Check In is a staff-only fallback for when no signature needs to be, or could be, captured — the adult has already gone, the device wasn't to hand at the door, or you're correcting a child who was missed at drop-off.
It's quick, it captures no signature, it does not meet a signature requirement. If your center's policy or your licensing requires a signed handoff, a Check In hasn't produced one — and nobody looking at the record later can tell who brought the child.
Use it when there's genuinely no other option, and follow your center's policy on what to do afterwards.
Using Check In
Tap the child's card under Not here, then press the green Check In button at the left of the action bar.
That's it. The child moves up to Here now, their card picks up a green check, and the time is recorded against them.
Check Out works the same way in reverse — select the child from Here now and press Check Out.
You can select several children at once and check them all in with a single press. When you do, count the selection against the children actually in front of you before you press it — a child you missed stays in Not here, and a child you selected by mistake is marked present when they aren't.
The record shows that the child arrived, what time, and that a staff member recorded it.
Signing a child in
On Today, find the child/ren under Not here and select them.
Choose Sign In and select who is dropping off.
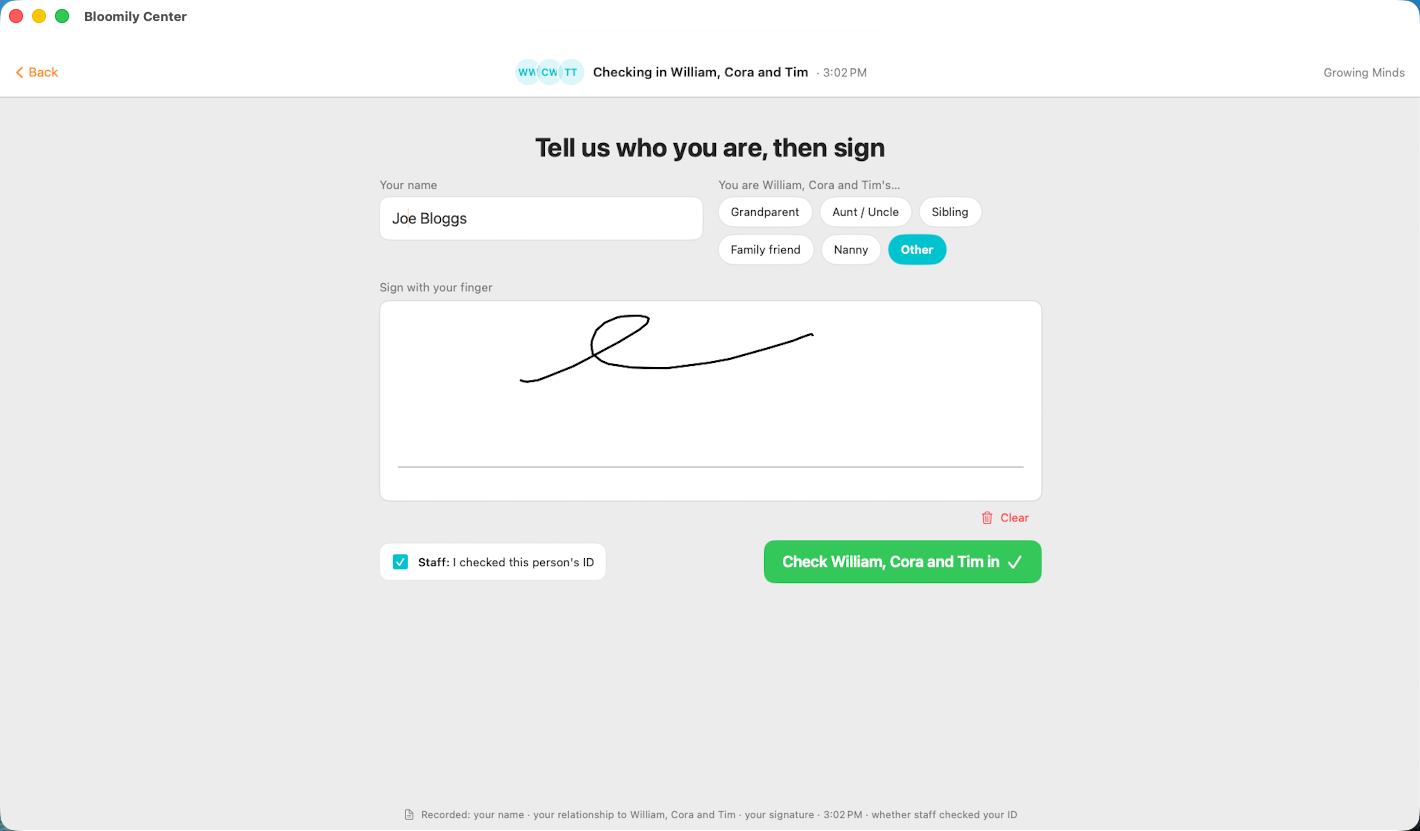
Enter the first and last name of the person dropping off.
If the form asks for the person’s relationship or phone number, complete those fields. These questions depend on the school’s settings and whether the person is already on the pickup list.
When the signature box is shown, ask the person to sign it themselves. If your school enables pickup-PIN verification, a person already on the pickup list may instead use their own PIN. Follow the verification action shown; do not enter someone else’s PIN.
Where your center requires it, tick Staff: I checked this person's ID.
Select Check [child/ren name] in.
The child moves from Not here to Here now, and their attendance record updates.
You can select several children at once. Choose everyone arriving together — siblings dropped off by the same adult, for example — and the handoff is recorded once against all of them.
Signing a child out
The same path, one button apart.
On Today, select the child from Here now.
Press Sign Out.
Follow the identity and verification steps shown for your school, then complete the check-out.
This works for one child or a group. Select everyone leaving together — a family collecting siblings, or a staff member taking a group out for an enrichment session — and record the handoff once.
What gets recorded
Review the saved handoff record for the person, time and verification evidence actually captured. Relationship, phone and staff ID-confirmation fields depend on the organization’s configuration and whether the person is on the pickup list. Do not claim a drawn signature was captured when PIN verification was used.
Follow your center’s authorization and ID policies on every handoff. Entering a person’s name is not evidence that they are authorized to collect the child.
Before you release a child
Check the person collecting is on the child's authorized pickup list before you start the sign-out, not after. The child's profile shows who is authorized.
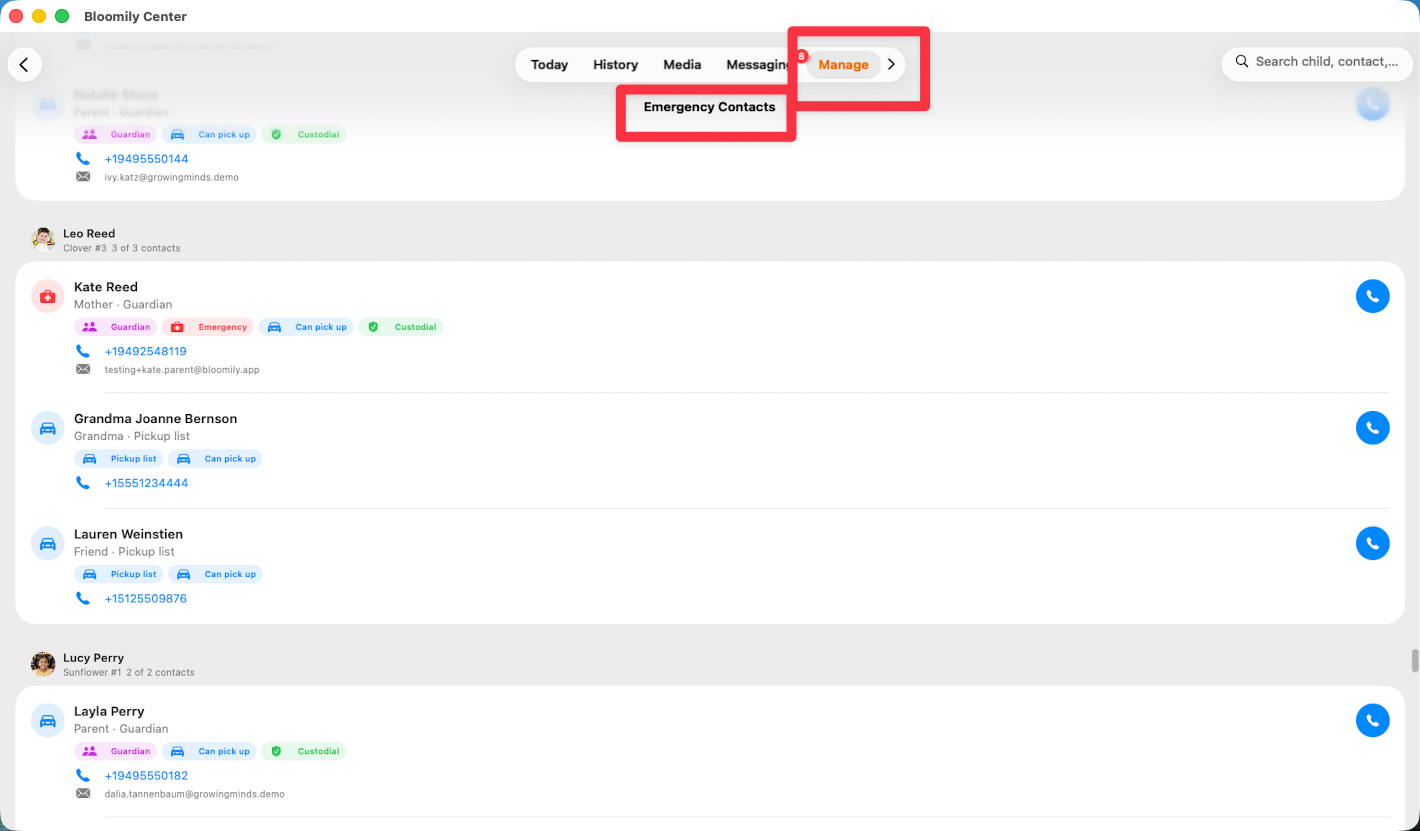
Go to manage > emergency contacts and search for the child's name to see emergency contacts, authorized guardians and authorized pick-up list.
If someone isn't on the list, or you aren't sure, stop and get your director. That is not an awkward thing to do — it is the entire point of the list.
If attendance looks wrong
Open the child’s record and check how attendance was recorded, by whom, and which handoff evidence is present. No drawn signature does not necessarily mean no handoff details: an enabled pickup-PIN flow can record different verification evidence.
If it's still wrong, tell your director. Attendance is a compliance record, so corrections go through them rather than being edited in the room.
Every screen has a ? guide button that explains the page you're on. For anything else, use in-app support or email support@bloomily.app.
Was this helpful?