Choosing and Reviewing a Pay Period
Select the exact period before reviewing or exporting staff hours.
Last updated About 2 hours ago
Select the exact period before reviewing or exporting staff hours.
1. Open Overview
Open More → Timesheets in Admin OS. Read the selected pay period before making changes.
2. Expand the period list
Choose Choose a pay period and select the required date range. The highlighted row identifies the selected period.
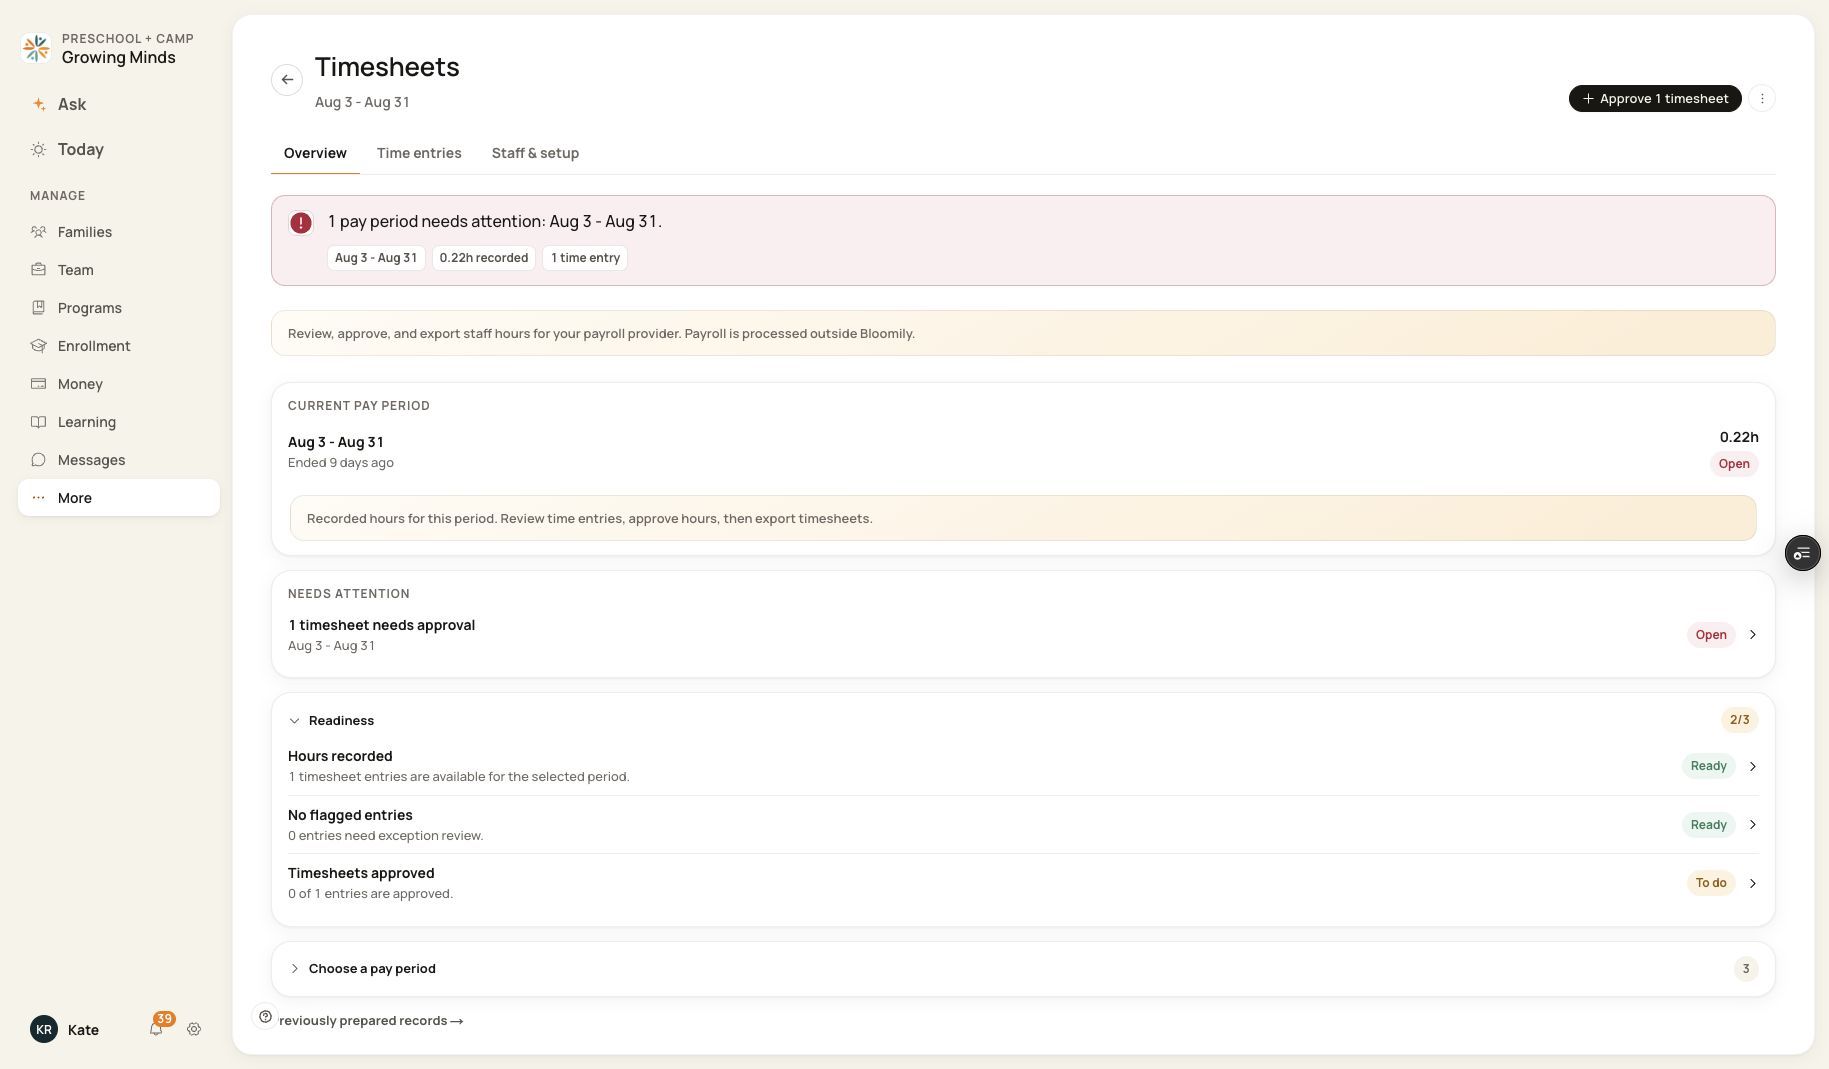
The period selector is below the readiness summary.
3. Review the selection
Check the heading, dates, state and readiness. Do not assume the period initially shown contains today.
4. Open its entries
Choose Time entries and check the period in that heading before using import, correction or export.
Before you finish
An empty period contains no filed hours yet; it does not necessarily mean no one worked.
Related guides
Screenshots show an example center. Pay periods, approval, rounding, breaks and overtime settings depend on your organization’s configuration.
Was this helpful?